Showing posts with label cooking. Show all posts

Friday Finds

I'm so excited to share my finds this week, but even more excited to hear about yours! If you've posted any links on your blog this week, please share a link so we can see what you've discovered, and if you're blog-free but have something fun to share leave a comment. I can't wait to see the goodies you have to contribute!


@Cottage Industrialist: Love this math-y memory game. Such a simple idea and adaptable to so many skill levels!

@Restoration Place: Great idea for a handwashing lesson. My kids wash their hands, but they just. don't. get. it. I think that this wonderfully visual example is just what we need!

@maya*made: More on stamping with kids. We love this foam stamp idea, and have used it many times, but not in big groups...how clever!


@The Long Thread: A lovely way to adorn a tote with a favorite piece of child's artwork.

@This Little Project: Jedda has a fantastic way to organize and corral your child's collection of art supplies. I just love this solution!

@Katie's Nesting Spot: A fun way to put a bit of math and counting into lunch. What fun :)


@Our Big Earth: Love this robot costume, and the boy-craftiness about it (although I know plenty of girls who would love this too!)

@A Bit of This and A Bit of That: What a fun way to create marbleized paper with supplies you already have. Lovely work!

@Make and Takes: Fun idea to craft up a little pot of gold and a rainbow for the little leprechauns in your family.


@Mrs. D. Lightful: What an unspeakably fantastic idea! Jelly bean bracelets!

@Scribbit: Also on the boy-front, Michelle shares her favorite read-aloud books for boys.

@Oliebollen: Has a fun printable solar system mobile to assemble, along with fun Pluto-related facts to share with the kids and plenty of other silliness!


@A Friend to Knit With:
I love these yarn bowls created papier-mache-style around a balloon form.

@Five Minutes for Books: We all enjoy the "What Makes a Rainbow" board book (at least I did the first jazillion times) , and what a fun little activity to go with it!

@Inchmark: Fantastic idea for handmade birthday cards for kids. Includes candy, which should please any child (especially my sugar-deprived ones!)

@Happythings: One of our favorite all-time snacks, peanut butter balls (a.k.a. energy balls, since all that protein really keeps you going!

Have a fantastic weekend!
Friday Finds SocialTwist Tell-a-Friend

Let Them Serve Themselves


Marie at Make and Takes posted last week about ways that she encourages independence in her kids.  I'll admit that I sometimes have to let go of my clean-house-hangups, but I try to give my little ones age-appropriate opportunities to serve themselves rather than continuing to depend on me for, well, everything!  As they've gotten older and had practice with the tasks I provide we've had fewer messes, less spillage, and, honestly, a bit less work for me!  A few of my favorites:
  • I keep a portion of milk in pint-sized plastic bottle that the kids can easily get out of the fridge themselves.  They can pour a cup or add it to cereal without risk of spilling (too much).
  • Our set of condiment cups has come in handy for allowing the kids to serve themselves, well, condiments!  Enough brown sugar or raisins fits perfectly and the children can add it to their oatmeal without contaminating the entire jar.  They're also handy for enough peanut butter to spread on crackers, or ketchup for a few fries. 
  • Daisy loves to help in the kitchen and I give her whatever tasks she can handle.  She uses her little chopper to help cut veggies for stew or fruit for salad, and is great at measuring.  It may not all make it in the bowl, but in another couple of years she'll be well-prepared to cook with just a bit of supervision. 
  • We all have jobs in the house, and each 'older' child is responsible for putting the childrens' dishes away, putting their own dishes in the sink after meals, and bringing their laundry basket to the laundry area.  Oh, and they love to clean the toilet (it's right at their level!). 
How do you encourage your children's independence?  Do you have specific chores that they're required to help with?  (I can always use a bit more help around the house :)
Let Them Serve Themselves SocialTwist Tell-a-Friend

Cardamom Spiced Monkey Bread


I remember a few treats from my childhood, and a favorite is definitely monkey bread. It's a simple treat and can be made using frozen bread dough (if you're short on time or, ahem, skill) and I would have to say that it's not altogether *that* bad for you. Once you're comfortable with the recipe it's easy to tweak it a bit to include favorite ingredients, like my variation with cardamom. Mmmmm, it tastes extra-cozy!

Cardamom-Spiced Monkey Bread

Ingredients:
  • 2 1/2 tsp yeast
  • 3 c all-purpose flour
  • 1 tsp salt
  • 1/4 c sugar
  • 2 tbsp room-temperature butter
  • 1 c water
  • 1 tsp ground cinnamon
  • 2 tsp ground cardamom 
  • 1/2 c sugar
  • 1/2 c butter 
  • 1 c brown sugar
  • 2 Tbsp light corn syrup 
  • 2 tsp ground cardamom
Method:
  • Make the dough by hand, in a mixer, or using the dough setting on your bread machine using  yeast, flour, salt, white sugar, 2 tablespoons butter, and water. 
  • In a medium saucepan on low heat, melt 1/2 cup of butter, stir in brown sugar, cardamom, and corn syrup. Stir until it forms a smooth syrup. Remove from heat.

  • Roll dough into a long log and cut dough in one inch chunks. Mix 1/2 c sugar, cinnamon, and cardamom together and drop one chunk at a time into the spiced sugar mixture. Thoroughly coat dough pieces, then layer them loosely in a greased bundt pan, then pour the syrup that you cooked together over the whole thing.  It will trickle down and coat all the pieces (and it's a lot more kid-friendly than trying to dip the chunks of dough).  I like to put the extra spiced sugar mixture in my cinnamon-sugar shaker since it makes the most delicious cinnamon toast.


  • Let rise in a warm spot until dough is just over the top of the pan, 20-30 minutes.


  • Bake in a preheated 375 degree F (190 degree C) oven for 20 to 25 minutes or till golden brown. Remove from oven, place a plate face down in top of the pan and, using oven mitts to hold plate on pan, turn over both until bread slides out onto plate. Serve warm...and enjoy!
Cardamom Spiced Monkey Bread SocialTwist Tell-a-Friend

Thick, Chewy Gingersnaps

I'm so excited to be a contributor to a new channel at Blissfully Domestic:


You'll find tons of fun ideas to share with your kids from a bunch of my favorite crafty bloggers, and today I'm sharing a post with a recipe for my very favorite thick, chewy gingersnaps.  They're a particularly easy recipe to let children help with (lots of hand-mixing, rolling, and smushing), so head over and check out Blissful Kids!
Thick, Chewy Gingersnaps SocialTwist Tell-a-Friend

Mini Puff Pancakes with Berries, Yum!

If there's one thing I truly believe in, it's a hot breakfast. I love breakfast cereal (don't tell my husband about the secret Cookie Crisp stash!), but it makes a better late-night snack than breakfast. All carbs. I need protein to start my day right. (Or oatmeal. Oatmeal's good too, but that's another post!). With school starting at 8:05 sharp we have to leave the house by 7:45, not leaving much time for breakfast creativity. That's where this recipe comes in. Mix up a batch in the blender, distribute into a muffin tin (our recipe makes 12, so maybe two small muffin tins) and bake them up while you get the kids dressed and find a spare moment to brush your teeth (hey, it's your 'me time').

They come out all puffy and golden, but the fun starts as they deflate a bit leaving a well for your favorite toppings. We had peaches and blueberries with a little dollop of greek yogurt, but lemon juice and powdered sugar is also good, or fried cinnamon apples. Tastes more like dessert than breakfast (shhhh!).


Mini Puff Pancakes 
1/2 cup flour
3 eggs
1/2 cup milk
2 tablespoons melted butter
1 teaspoon vanilla 
1 tablespoon sugar
1/4 teaspoon of salt 
Preheat oven to 450F.

Add all the ingredients to the blender and whir until combined.

Spray your muffin tin with cooking spray.

Distribute batter evenly between cups.

Bake about 12 minutes on the middle rack.

Let cool 5 minutes before removing or they'll stick.

Eat.

See how easy that was?  You can do it!


****

...Boycraft month begins tomorrow!  Don't forget to subscribe!
Mini Puff Pancakes with Berries, Yum! SocialTwist Tell-a-Friend

From the Archives: Yummy, Yummy Granola

This afternoon Josie and I enjoyed some rare time with just the two of us (go naps!) and mixed up a fresh batch of granola to go with our yogurt. This is nice recipe to pull out when the kids are helping since all of the measuring is so approximate (handful of this, dump in some of that...), and you can use whatever you happen to have in the pantry. You can easily vary the recipe with whatever kinds of nuts, extracts, and dried fruits you like so that every batch is different! (image via mattbites.com)

Ingredients:
  • 6 c rolled oats
  • 2 c crisp rice cereal (we use crisp brown rice, or you can use extra oats)
  • 1 1/2 tsp salt
  • 1 c total any combination of the following: maple syrup, honey, or corn syrup
  • 1/2 c brown sugar
  • 3/4 c vegetable oil
  • 1 tsp: ground cinnamon or cardamom (optional)
  • 1 tsp: vanilla, almond, coconut, or other extract (optional)
  • up to 2 c: raisins, craisins, or dried blueberries, or chopped dried dates, apricots, mangos, shredded coconut etc. (optional)
  • up to 1 c: chopped walnuts, pecans, almonds, or pine nuts (optional)
  • 1/2 c flax seeds, whole or ground (optional)
Directions:

  1. Preheat the oven to 325 degrees F (165 degrees C). Line two large baking sheets with parchment paper or aluminum foil.
  2. Combine the dry ingredients (except sugar) in a large bowl and stir it up. Mix everything else in a saucepan. Bring to a boil over medium heat, then pour over the dry ingredients, and stir to coat (let it cool a bit first if you're letting a child stir to coat). Spread the mixture out evenly on the baking sheets.
  3. Bake until crispy and toasted, about 20 minutes. Stir once halfway through.
  4. Let cool and break apart.
To make granola bars simply press mixture into a 9" x 13" pan and bake about 20 minutes without stirring. Let cool, then use a serrated bread knife to cut into bars.

What have you been cooking up lately?
From the Archives: Yummy, Yummy Granola SocialTwist Tell-a-Friend

Muffin Tin Monday!

I'm so excited to be hosting Muffin Tin Monday for Katy at Sycamore Stirrings while she explores her future home of Luxembourg (I was so far off in my guesses...New Hampshire? A Canadian Province? Nothing nearly so exotic as Luxembourg!).


Today I made a tin for my two oldest to share (although the baby came along later and hoovered up all the leftover tomatoes and snap peas!). They had watermelon, tomato and cheese sandwiches, snap peas, grape tomatoes, and dill dip (which goes surprisingly well with watermelon!).
To add your tin, please either leave a comment on this post or email your posts &/or photos to amanda [at] kiddio [dot] org and I'll add them to today's listings. Thanks for dropping in!

Muffin Tin Mommies: Muses of Megret The Family McG mommamania A Bit of This and A Bit of That Junior Mints and Reese Hornacek Family The Coach's Wife
Muffin Tin Monday! SocialTwist Tell-a-Friend

Easiest, Most Delicious-est Ice Cream Cake Ever!

If you haven't been reading the Amy's Notebook posts on Mom Advice, you've got to have a peek.  Last month she passed along a link to a recipe at 50s Housewife for a super-easy cake made from ice cream sandwiches.  After completely failing my previous attempt at an ice cream cake, this totally lit the little lightbulb that hangs over my head (not to mention my total 50's housewife-ness!)  How obvious is that?  You stack up a bunch of ice cream sandwiches, throw in some filling, and slather the whole thing with sweetened whipped cream before throwing it back in the freezer.  With that I present you with Jasper's third birthday cake!

Before:

After:


Honestly, it was delicious. I varied the recipe a bit by using both vanilla and mint-chip ice cream sandwiches (a total of 20), plus filling it with oreo cookies and hot fudge sauce. Next time I'm thinking that I'll use butter pecan ice cream sandwiches and fill it with caramel and toasted pecans. Or maybe neapolitan with fresh strawberries? Yum.

(p.s. the spots are made from Starburst candies, softened in the microwave and formed into spots...I think that I saw this on Angry Chicken?...and the 'bow' is made from some "Yogos Rollers" brand fruit snacks. We all think it looked like bacon.)

The basic recipe is originally from Real Simple, though I switched it up a bit

Ice Cream Sandwich Cake:
1 1/2 cups heavy cream
3 tablespoons confectioner's sugar
2 teaspoons vanilla
20 ice cream sandwiches (3.5 ounces each)
1 1/2 cups chopped oreo cookies (about 10)
1/4 c hot fudge sauce

Whip the cream, vanilla and sugar until stiff peaks form.

Lay out half of the ice cream sandwiches in a rectangle on a foil-covered serving plate. 

Spread with half the whipped cream, then sprinkle with chopped cookies and drizzle with fudge sauce. 

Repeat with the remaining sandwiches and whipped cream.

Decorate as you like, then return to the freezer asap!
Easiest, Most Delicious-est Ice Cream Cake Ever! SocialTwist Tell-a-Friend

Cooking from the Garden, or How to Use Up All those Vegetables You/Your Neighbor Grew

We've just arrived home from an, er, extended vacation to my parents' house only to realize that our vegetable garden has kept going without us. The tomato plants are absolutely staggering under the weight of red and green fruits, the rhubarb is a huge mass of stalks and leaves, giant zucchini have magically appeared, and the haricots verts (tiny green beans) are ready for garden snacking. The beets and carrots are overdue for a good pulling, and a green pumpkin the size of a healthy turkey has taken up residence in the middle of our plot. After a harvest bonanza we shared a fair bit with our neighbors, but still have quite the bounty to cook up. Late summer brings these lovelies to the garden and farmer's market, and it seems that everyone is coming up with tasty, creative ways to bring them to the table. Here are a few recipes that we in the Kiddio house have enjoyed, along with a selection of ideas from around blogland! (image via flickr/framajo)

Harvard Beets (I was astonished to find that each of my children adores beets...while I think that they taste remarkably like the soil that they grew in. This recipe makes something even I'd eat!)

3/4 c. sugar
1 T. cornstarch
1/3 c. white vinegar
1/3 c. water
pinch salt
about 6 fresh beets, peeled and sliced

Combine sugar, cornstarch, vinegar, water, and salt in a heavy saucepan. Bring to a boil over medium heat and stir until sugar is dissolved. Add beets (the liquid will not cover them, but they'll let out a lot of super-staining purple juiciness) and simmer an additional 30 minutes, stirring occasionally. Keep refrigerated!

Rhubarb Cake (Daddio quite fancies rhubarb and this is a nice switch from the usual rhubarb pie. Also makes a nice breakfast (don't tell my mother I said that!))

1/2 c. butter
1 1/2 c. sugar
1 egg
1 t. vanilla extract
2 c. flour
1 t. baking soda
1/4 t. salt
1 c. buttermilk or scant cup milk + 1 t. lemon juice
3 c. chopped rhubarb

Cream butter and sugar together until fluffy, then add egg and vanilla, beating well. Combine flour, baking soda, and salt in a bowl. Alternate adding 1/3 dry ingredients with 1/3 milk, beating well between each addition. Finally, stir in rhubarb and spread into greased 9"x13" pan. Bake at 350 degrees for about 30 minutes.

(We're at high altitude, so I cut back on the sugar a bit, add an extra egg, and put in an extra Tbsp. of flour, then it usually bakes a bit longer than usual. For more on high-altitude baking modifications, check out Allrecipes.com's tips )

Sweetie Pie Pickled Veggies (I may be revealing my inherent pickiness, but I've only just realized that I just love pickles. This is a great recipe for a variety of vegetables including the standard cucumber, and a fun recipe to put together with kids).

1 t. pickling salt
1/2 c. peeled ginger, sliced thinly
1 1/2 c. rice vinegar (cider vinegar works in a pinch)
1 1/2 c. water
1 1/2 c. sugar

Any combination of four of the following:
1/2 lb. small pickling cucumbers sliced into 1-inch sections
2 c. diagonal carrot slices (1/2 inch thick)
1/2 lb. asparagus spears
1 large red bell pepper cut into 1-inch squares
2 c. 1-inch wide strips watermelon rind
2 medium sweet onions cut into 1-inch chunks

Toss the cucumbers with 1/2 t. salt, let sit 1-2 hours. Combine ginger, vinegar, water, sugar, and remaining 1/2 t. salt in saucepan. Bring to a boil and stir to dissolve the sugar and salt. Remove the pot from the heat. Drain and rinse the cucumbers, and pack veggies loosely in two 1-quart jars. Pour hot liquid over vegetables, cover jar, and refrigerate for 2-3 days. Keep refrigerated up to 3 months and enjoy!

Recipes from around blogland:

Tiny Morsels has completely blown my mind with her recipe for zucchini fries.

With the zucchini you have left over from the fries you can make zucchini soup (which I didn't think sounded a bit palatable until I read Mary Beth's recipe at Salt and Chocolate!)

In the same vein, Plum Pudding offers up recipes for summer squash, including zucchini quesadillas.

Katy at Sycamore Stirrings shares a recipe for curried carrot soup...a nice way to use up all those carrots I forgot to thin!

Scribbit has been making fresh strawberry ice cream (which I'm planning to pick strawberries for as soon as I can get to the berry farm...)

Okay, so I don't have a banana tree (yet!), but Pepper Paints' chocolate-covered-frozen-bananas-with-sprinkles look delicious!



Cooking from the Garden, or How to Use Up All those Vegetables You/Your Neighbor Grew SocialTwist Tell-a-Friend

Easy Bake: Tasty Cake and Cookie Recipes from Scratch

When my mom was in town a few weeks ago we stopped in at one of my favorite thrift stores. As we browsed the kid-clothes my daughter found her heart's desire: the Easy Bake Oven. I wasn't so sure; she's been cooking with me since she was big enough to hold a whisk and I didn't want to, well, ruin her early cooking experiences with a dinky little plastic oven. I tried explaining that it's for eight year olds, that it made not-so-delicious desserts...but nothing could keep my mother from being moved by her granddaughter's wish (particularly since she's usually more than happy to put things back with a simple 'no') and into the cart it went. Honestly, it's not that I didn't want her to have the oven--I have nothing but fond memories of my own, I just wasn't sure whether she was old enough for it and really wasn't sure what my husband would think about our foray into lightbulb cookery.

I could not have been more wrong.

It was a completely worthwhile $2 investment for a number of reasons:

First: My 5 1/2 year old really can use it all by herself, down to doing her own dishes (hey, that lesson can't start too early!).

Second: It makes tiny treats that are just enough to satisfy my our cravings. An itty bitty piece of cake has a lot fewer calories and less sugar than that cupcake I've been craving.

Third:I quickly figured out that I wasn't going to spend a couple of bucks for a mix that makes one cardboard-y little puck of a cake or a few tasteless cookies. Instead, we've been using some store-bought cake mixes I had on hand and finding great recipes to mix up our own treats.

Here are a few especially good recipes to try:

Brownies


2 T. sugar
1 t. oil
1/8 t. vanilla extract
4 t. chocolate syrup (like Hershey's)
2 1/2 T. flour
1/8 t. baking powder

Stir everything together.
Pour batter into a pan coated with nonstick cooking spray.
Bake 15 minutes.


Blondies


2 1/2 T. brown sugar
1 t. oil
1/8 t. vanilla extract
3 T. flour
1/8 t. baking powder
optional: a few white chips, chopped nuts, or 1 T. shredded coconut

Stir everything together.
Pour batter into a pan coated with nonstick cooking spray.
Bake 15 minutes.


Homemade Easy Bake Cake Mix, lemon or chocolate


1 c. sugar
1 1/2 c. all-purpose flour
1 1/2 t. baking powder
1/2 t. salt
1 t. lemon-flavored unsweetened Kool-Aid (lemon cake) or cocoa (chocolate cake)
1/3 c. vegetable shortening (I used trans-fat-free Crisco)

In a medium bowl, combine sugar, flour, baking soda, salt and drink powder or cocoa.
Cut in shortening until evenly distributed and mixture resembles corn meal.
Distribute about 3 T. mix into each of 10-12 ziploc bags.

To use: Combine mix and 1 T. milk. Mix together, bake 15 minutes.


Easy Bake Peanut Butter Cookies

1/4 c. flour
1 1/2 T. peanut butter
1 T. butter
2 t. brown sugar
1/8 t. baking powder
few drops vanilla

Stir everything together.
Roll into 1/2" balls (or scoop with a 1/2 t. measure) and flatten a bit with a fork (4 per batch).
Bake 10 minutes.


Easy Bake Oatmeal Cookie Mix

1 1/2 c. quick-cooking oats
3/4 c. all-purpose flour
1/2 t. baking powder
3/4 c. brown sugar
1/2 c. vegetable shortening

Combine oats, flour, baking powder and brown sugar.
Stir to blend.
Cut in shortening with a pastry blender until mixture resembles corn meal.
Spoon about 1/2 c. mix into each of 8 ziploc bags.

To use: Combine 1/2 c. mix with 2 T. milk. Stir until smooth, bake 15 minutes.


The Easiest Chocolate Frosting

1 T. chocolate chips
1 t. cream or half-and-half

Melt chocolate chips in dish on top of easy bake oven.
Stir in cream or half and half until smooth, then frost immediately. (you can also use peanut butter chips for variety)


To use boxed cake mix
(think Duncan Hines):

Method 1:Combine 2 T. mix and 1 T. milk. Stir until smooth, then bake 15 minutes.

Method 2:Combine 2 t. milk and 2 t. mayonnaise (it's just eggs and oil!), stir into 2 T. mix. Bake 15 minutes

We've used a few different kinds of mix--devil's food was good, german chocolate was great with a few white or semi-sweet chocolate chips thrown in, and 'funfetti' was cute, but I wouldn't call it delicious. We just keep the rest of the box of mix in a tupperware and mete it out 2T at a time. Enjoy!
Easy Bake: Tasty Cake and Cookie Recipes from Scratch SocialTwist Tell-a-Friend

recipes to share!


We love banana bread, if only because it uses up those bananas that get a little too squishy for kids to want to eat (just like we adore zucchini bread for it's ability to use up the zucchini that grow too big or too prolifically!). Katy at Sycamore Stirrings shared a great banana muffin recipe that's an awesome change of pace from banana bread. We tried it and oh, it is so delicious. Also, Ginger at Thinking Outside the Recipe has a great-sounding recipe for something she calls 'zeal balls.' They sound tasty, and like they'd use up that aforementioned zucchini surplus I see on my summer horizon. Plus, it seems like the recipe would be pretty adaptable to whatever you've got on hand.


image via sycamorestirrings.blogspot.com


recipes to share! SocialTwist Tell-a-Friend

strawberry-lime water: recipe

Last year for Mother's Day Josie (then barely 4) whipped up a special drink for me, and all summer we drank pitchers of our 'Mother's Day drink.' It's totally simple and delicious, and not so sweet that it isn't refreshing (don't get me wrong, I love me some lemonade, but it can be just too sweet to cool me down). You can vary the recipe infinitely based on what you've got in the crisper (or the garden), but here's the authentic:

Ingredients:
A handful of strawberries
A lime or two
1/4 c sugar
enough cold water and ice to make 2 quarts

Method:
Slice the strawberries into a pitcher. Slice the limes and squeeze them into the pitcher. Add the sugar and mash it all around with a wooden spoon. Add the water, let sit a bit (preferably overnight in the fridge) to let the flavors meld.

Oranges are also very good in this, as are apples (surprisingly so), mango, pineapple, and melon. You can also throw in a bit of mint before the muddling/mashing. Alternately you can skip the fruit and go for cucumbers and honeydew.
strawberry-lime water: recipe SocialTwist Tell-a-Friend

a few links and ideas to share

We're feeling a bit behind today since daddio is out of town and we're not even trying to pick up the slack. Here are a few things that I've been meaning to share:

  • Tiny Morsels shares another terrifically fun use for our under-appreciated waffle iron (mmm, I'm thinking that the melty almond [or peanut!] butter would be delicious, not to mention the other tasty options!)

  • The Small Object has a tutorial for stitching up your own reusable sandwich wrap (I've seen these, but making my own seems more fun. I'll add it to my list, which means I'll be finishing it around the time my children graduate college).

  • We eat tons of oatmeal around here. The Simple Dollar has a nice tutorial--and cost analysis--for making your own packages of instant oatmeal. I love the idea, particularly since my five year old can pretty much make instant oatmeal herself, but I might prefer to make up a big batch and measure out what I need each day rather than running through all those baggies. Oooh, also, we bought 'dinosaur egg' oatmeal one week (it had little eggs that dissolved to reveal dinosaur-shaped sprinkles-cute, but kind of icky) and once it ran out replaced it by hiding zoo-animal-shaped sprinkles at the bottom of the bowl. The kid stirs it up to see what kind of animal they got that day.


  • Finally: more on the granola front. Megan at Plum Pudding posted her recipe for chewy granola bars. Her first recipe is pretty similar to the recipe we use for granola (see our earlier post!) so I think we could throw in some of the yummy things we usually use, but I love the idea of the snackable bar. It's also on my list (ha!).


a few links and ideas to share SocialTwist Tell-a-Friend

tasty kid snack ideas: links, recipe

Every afternoon once Jasper wakes up from his nap we usually gather in the kitchen for a little snack (he's a slow waker-upper!). We've been through the usual ideas (apple and peanut butter, celery and peanut butter, carrots and dip, a little quesadilla, crackers and cheese....) 327 times and I've been in the market for some new ideas. Here's what my looking around yielded:

  • Salt and Chocolate has a neat idea for apple 'cupcakes' (basically apple halves topped with yummy things).

  • Smoothies! Tiny Morsels posted her recipe for their favorite smoothie and it sounds great! We usually throw in yogurt, frozen fruit, a banana, flax seed meal or flax oil, and some milk or juice, but I hadn't thought about spinach! We also freeze the leftovers into smoothie popsicles for a treat a few days later (since leftover smoothies just aren't that good).


  • I found a recipe for Fruit Kabobs (although it's really less 'recipe' than 'concept') which sounds like something we would all think is fun. You could probably swap out the skewers for pretzel sticks if you want to keep the tykes away from sharp wooden skewers.


  • If your child has allergy issues you might want to check out Tori's ideas for gluten/casein-free snacks, or this list from Chicago Parent.

And here are other ideas from our household:

  • Jasper made the brilliant discovery of the vegetable hot dog. Okay, really it's a baby carrot nestled inside a celery stick, hot-dog style, but it's the first time I've seen him eat so much celery!


  • We all enjoy frozen grapes (minimize the choking hazard by cutting them in halves or quarters lengthwise). Josie likes to load them into an ice cube tray and wait for the 'frost fairy' to stop by. I'm not sure whether she really thinks that they're frozen with fairy magic, but they're tasty!

  • Banana or zucchini bread or muffins are a nice snack, and you can throw some chocolate chips in the batter if you're feeling generous. Top with a spread of cream cheese to up the protein content if you like.

  • Speaking of muffins, we like our mini-muffin pan, which makes fun, little muffins in a hurry. Each cup is perfectly filled by a cookie scoop!


  • Throw a tea or hot chocolate party with a few finger sandwiches, cinnamon toast, or muffins. We use a little teapot so the kids can serve themselves.


  • Popcorn is a tasty snack, and you can toss it with some buttermilk powder for some extra tang (and a bit of protein), or make caramel popcorn with peanuts for a treat.


  • Our kids will often make themselves a bit of trail mix in a plastic bag to snack on. They get a handful of some variety of cereal, a few nuts, some raisins or dried cranberries, maybe a dried plum, then munch on it through the afternoon.


  • Mini pizzas with mini bagels or english muffins as a base.

  • When I was a kid my mom and I often made energy balls. I re-discovered the recipe and they're delicious! I especially like that they have a lot of protein, since it really keeps us going. They're easy to mix up and a nice recipe to put together with the kids:

Energy Balls

1 c. dry milk

1 c. oatmeal

1/2 c. peanut butter

1/2 c. honey

crushed peanuts, wheat germ, flaked coconut, ground flax meal (optional


Mix honey and peanut butter together, then stir in dry milk and oatmeal. Form into balls, then roll in peanuts, wheat germ, coconut, or flax meal if you like. Keep refrigerated!
tasty kid snack ideas: links, recipe SocialTwist Tell-a-Friend

sprinkles make 'healthy food' more appealing!


Okay, maybe saying 'healthy food' is wrong. My kids, at least, will eat a lot of healthy foods. But when things aren't going down well at the dinner table we sometimes break out the sprinkles to make things seem more palatable. Sure, you have to be judicious (steak and sprinkles?), but for foods such as plain yogurt and oatmeal you can put sprinkles at the bottom of the bowl to be a surprise as the food is stirred or eaten (we use animal-shaped sprinkles for this)!
sprinkles make 'healthy food' more appealing! SocialTwist Tell-a-Friend

gingersnaps: recipe

In our house love means cookies. Bad day? I'll make you some oatmeal cookies. Going on a trip? You'll find some chocolate chip cookies in your carry on. Cold, rainy day? Let's make some gingersnaps!


Things to keep in mind when baking cookies with little ones:

  • I usually try to find a recipe that uses oil or melted butter rather than having to cream butter with sugar with an electric mixer. It goes faster, it's easy for the kids to stir, and I don't have the danger of a whirling beater around little fingers (especially Jasper, since I don't quite trust him around our big Kitchen-Aid mixer when there's a lot going on).


  • Daddio will laugh at this, but I could barely get by without our cookie scoop. It's basically a small (about 1 Tbsp) ice cream scoop, but it makes shaping cookies so much quicker and easy enough for about a four year old to help with. It also makes evenly sized pancakes and kid-sized scoops of ice cream.

  • Kids are capable of cracking eggs at around four years old. Have them crack them into a separate bowl (so you can fish out the errant bits of shell) and wash their hands afterward.


  • Don't let them taste the batter once you've added eggs. I know it never made me sick, but you just never know!

Big, Soft, Chewy Gingersnap Cookies


1/2 cup melted butter

scant 1 cup sugar

1 egg

1/2 cup molasses

2 cups flour

1 teaspoon baking soda

1 teaspoon ginger

1 teaspoon cinnamon

1/8 teaspoon cayenne pepper (optional, but makes them extra-snappy!)

1/2 teaspoon salt

Sugar, for rolling


Instructions:


1. Stir butter and sugar together; add egg. Beat well. Stir in molasses. Add dry ingredients and stir until combined.


2. Shape 1-inch balls and roll in sugar. Place on a lightly greased or non-stick cookie sheet.


3. Bake at 350 degrees for 8-10 minutes or until done.


With this recipe you can use up to double the spices for a spicier cookie (it's not that snappy to begin with). I let the children scoop the dough into the sugar, roll the balls, and place them on teh cookie sheet (for even redistribution by me). We really had a great time, and I hope you do too!


more from the collective:

gingersnaps: recipe SocialTwist Tell-a-Friend

diy baby/kid food: review

So you now know that Adelaide (the youngest member of the collective) is totally into pickles. I don't know that I would've let Josie love pickles as one of her first handful of foods (thanks to my maternally overprotective instinct), but daddio and I have encouraged our kids try a wide variety of strange and unexpected foods and have made nearly all of their 'baby food' (that is, the purees, snacks, and chopped up stuff that they eat for the first six months or so). So far it's really worked! We have a couple of kids who will eat just about anything (Josie avoids spicy things, Jasper's not really into meat, and we all dislike avocados, but everything else is fair game). Thank goodness, since I was such a picky eater. I don't quite know how my mother put up with it!
Fundamental to our strategy to make our children the type who will eat anything was the 'making our own baby food' part, plus introducing them to bits of table food as early as possible (which is why Adelaide was enjoying bits of watermelon and sucking on a celery stalk yesterday). I would have to say that it has been a pretty easy addition to what we already do, and that it has saved us tons of cash in the process. You don't need much to start the process, and even if you're only making some of your kid's food you'll still be saving money, producing less waste, and feeding your baby foods that taste like real food....setting them up to love real food later!

So what do you need to get started?

1: A blender, food mill, baby food grinder, or food processor. When I'm churning out batches of baby food to freeze I prefer the blender, but as they get a bit older and I'm processing a bit of what we're having for dinner or grinding batches of chunky food like chicken pot pie I like the mini food processor or baby food grinder. Nothing special here, and I'll bet you've already got one of these in your kitchen.

2: Ice cube trays and zip-top freezer bags. Once you blenderize the food with a bit of water or breastmilk, just pour it into ice cube trays and freeze it until solid, then turn it out into freezer bags for long-term storage. I have a stash of trays that I picked up at the thrift store for about $1 for six.

3: Food. You can use fresh or frozen fruits and vegetables, regular full-fat yogurt, jarred nut butters (e.g. cashew and almond), or even what you've made for dinner. We don't really limit seasonings, but I generally don't add salt or butter, etc, to simple purees.

Seriously, that's it. I can buy a big bag of organic frozen peas, cook, puree, and freeze about 12 servings in ten minutes (and empty the dishwasher while the peas cook). I know what's in the food and that it tastes fresh and like sweet garden peas rather than pale, mushy canned peas. All told, it costs about ten to fifteen cents per serving with no jar or container to throw out.

This is really a simple guide to get you started. To really get the job done I've relied on two books to supply guidelines about what foods should be fed at what ages (e.g. no yogurt until 9 months, no corn until a year, etc) and how to process certain foods (you have to cook some foods but not others, must be careful peeling mangos, etc), and recipes to combine foods and make my own cereals. I've looked at a lot of choices and own several, but these are my go-to guides:

Super Baby Food by Ruth Yaron. This book has a sort of gonzo "I made it in my basement" quality about it, and the author comes across as a little nutty, but it is an absolute goldmine of nutritional information about any fruit, vegetable, grain, or vegetarian option you can think of. She's got recipes for various cereals (like her super porridge), discusses the importance of adding supplements like flax oil to boost omega-3s, even recipes for playdoh and other fun toddler stuff. This book is a great choice for vegetarians, too, since I believe that she has raised her children in a meat-free environment, but she discusses the preparation of meat foods as well. The first half of the book is devoted mostly to how to start feeding your baby foods, where to start, how to ramp it up, sample menus, etc. If you only buy one book, buy this one.

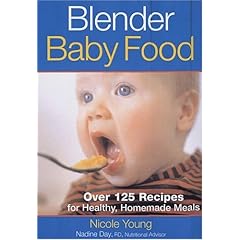
Blender Baby Food by Nicole Young. I got by with "Super Baby Food" with Josie, but I really wanted to branch out a bit and make some more interesting foods with Jasper. This book really did that for me. It focuses on the 6-12 month age range with sample menus and recipes for each age. Many of the recipes we still enjoy (like the Citrus Couscous, Veggie Paella, and Jambalaya. Even the purees are fun, like Rhubarb, Apples, and Berries, or Trout, Zucchini, and Potatoes. I think it really broadened Jasper's tastes.

Finally, since I've somehow been blessed with kids who will eat anything, I keep running out of ideas. Seriously, I'd love to fall back on chicken nuggets and mac and cheese sometimes, but they want to eat! So I picked up Toddler Café: Fast, Healthy, and Fun Ways to Feed Even the Pickiest Eater at the library and I have to order a copy for myself. The 'picky eater' part sort of threw me, but it's full of great ideas for fun meals that are really healthful and full of fresh good food that isn't too far out there (like random curries and the like which my kids will eat, but I wanted simple food). It's from Chronicle Books (where all good books seem to be born) and they have some recipe excerpts on their website if you'd like to check them out. If you want to have one book to inspire you to feed your little kids well, this is really it.
diy baby/kid food: review SocialTwist Tell-a-Friend

yummy, yummy granola: recipe

This afternoon Josie and I enjoyed some rare time with just the two of us (go naps!) and whipped up some granola to go with our Brown Cow yogurt (the cream top is so delicious!). This is a great recipe to do with kids since all of the measuring is so approximate (handful of this, dump in some of that...) and it's easy to mix up a big batch. You can also vary the recipe with whatever kinds of nuts, extracts, and dried fruits you like so that every batch is different!

Ingredients:
* 6 c rolled oats
* 2 c crisp rice cereal (we use crisp brown rice, or you can use extra oats)
* 1 1/2 tsp salt
* 1 c total any combination of the following: maple syrup, honey, or corn syrup
* 1/2 c brown sugar
* 3/4 c vegetable oil (we prefer canola since it provides some omega-3 fatty acids)
* 1 tsp: ground cinnamon or cardamom (optional)
* 1 tsp: vanilla, almond, coconut, or other extract (optional)
* up to 2 c: raisins, craisins, or dried blueberries, or chopped dried dates, apricots, mangos, shredded coconut etc. (optional)
* up to 1 c: chopped walnuts, pecans, almonds, or pine nuts (optional)
* 1/2 c flax seeds, whole or ground (optional)

Directions:
1. Preheat the oven to 325 degrees F (165 degrees C). Line two large baking sheets with parchment paper or aluminum foil.
2. Combine the dry ingredients (except sugar) in a large bowl and stir it up. Mix everything else in a saucepan. Bring to a boil over medium heat, then pour over the dry ingredients, and stir to coat (let it cool a bit first if you're letting a child stir to coat). Spread the mixture out evenly on the baking sheets.
3. Bake until crispy and toasted, about 20 minutes. Stir once halfway through.
4. Let cool and break apart.

We added vanilla and almond extracts, shredded coconut, ground flax meal (gives it a nice nutty flavor) and sliced almonds today. Since our fridge is full of strawberries and bananas we didn't add any other dried fruit. It made a great afternoon snack, too!
yummy, yummy granola: recipe SocialTwist Tell-a-Friend

bringing kids into the kitchen


A couple of people have asked me* why on earth I would a two year old or even my five year old cut things up. They could injure themselves! Knives are dangerous! Since I mostly agree with this, and like my kids with all their digits intact, I gifted them each with a wavy chopper from the Montessori Services catalog. It requires both hands to push down with sufficient force to cut something, and simply isn't sharp enough to slice their little finger or for one to actually injure the other when they start bickering. Truth be told, it was a great purchase. Josie can make herself a little fruit salad for lunch, make the salad for dinner with me all by herself, and it's just handy to keep her or Jasper occupied when I'm trying to get something on the table for all of us to scarf down before bedtime.

Really, though, I've always had the kids doing something with me in the kitchen. Since I really enjoy cooking and, especially, baking delicious things like pie, it was very natural to make the kids a part of it early on. Kids are great at adding ingredients from about 2 years old, and by four can be trusted to measure with relative accuracy. Little ones can also be trusted with stirring (gently, please!) starting around 2, peeling vegetables with a peeler rather than a knife (around 3 1/2), and using a rolling pin (around 3). Whether their help is actually helpful is totally up to you :) Obviously you shouldn't leave them to stir the hot kettle of soup on the stove, take things out of the oven, turn on the mixer, etc, but the little bit of extra time it takes to work with the kids is really worthwhile when you see how much more interested in eating it makes them!

Also, I've always been happy to let the kids sit up on the counter or stand on a chair to help, but I've heard great things about Learning Tower, basically an enclosed stepstool that keeps your kids up at counter level without the risk of falling (neither Jasper nor Josie have fallen off, but I can see the inherent risk!).

Josie says that her favorite thing to make is Macaroni and Cheese, so here's a recipe to try:

Mackieroney and Cheese

1 lb pasta like cellentani, elbows, or shells, cooked al dente and drained.
5 Tbsp butter
5 Tbsp flour
3 cups milk
1 1/2 tsp salt
1 tsp dried mustard powder (it's with the spices)
1 lb shredded cheddar cheese (we like the Tillamook x-sharp white cheddar)

Preheat oven to 350 degrees.
Place the butter and flour together in a 1+ quart glass bowl. Microwave for 1 minute. Stir with a whisk. Microwave a minute longer, then whisk in milk. Microwave for about 3 minutes more, stir, then cook another few minutes until thickened. Stir in cheddar cheese until melted. Stir in pasta, then put it in a buttered 9"x13" casserole dish and bake for about 25 minutes or until it's bubbling thickly around the edges and is a bit brown.

My kids like it with broccoli or peas.


* look, the easiest way to communicate with me (and I'd love to hear from you) is to leave a comment down at the end of this post (or any other). alternately, you can email me at librarycollective at gmail dot com, or talk to me after preschool, which seems to be when I get a lot of my communicatin' done.
bringing kids into the kitchen SocialTwist Tell-a-Friend