Showing posts with label project. Show all posts

A Craft a Day in April


I've felt a bit like I lost my crafting mojo lately among all the dishes and laundry, and I was inspired by Jean over at the Artful Parent to plan an activity a day for the month of April*.  Jean's ideas all sounded like such fun and just what I needed great way to really re-engage with the kids after a long winter.  Admittedly, we may well not complete every activity on the expected day or even finish quite all of them this month, but we'll have a good time trying! (image via mesh2)

1 - Pop-up birthday cards for Daddio
2 - Fingerprint bunnies
3 - Paper birds
*
6 - Bunny craft
7 - Pecking hens
8 - Potato print chicks
9 - Jellybean necklace
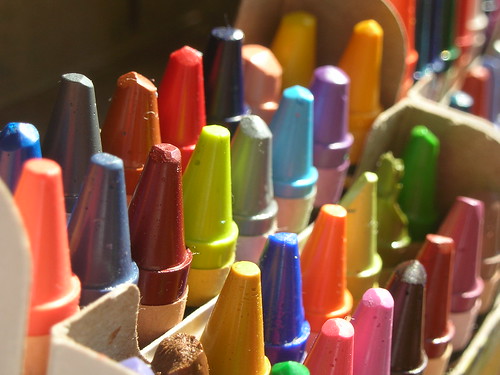
10 - Springtime crayon resist
*
13 - Kids' address book
14 - Stationery set for Daisy
15 - Ribbon hair bows
16 - Folding letters
17 - Tissue paper flower pictures
*
20 - Rain gauge
21 - Garden craft
22 - Playdough nests
23 - T-rex sponge prints
24 - Felt flowers
*
27 - Tissue overlay flowers
28 - Splatter dino eggs
29 - Make pretzels
30 - Chirpy chick drawings

*except for the weekend, since that's our time with daddio and he has his own crafty plans!

What are your plans for April?
A Craft a Day in April SocialTwist Tell-a-Friend

Clothespins + Buttons = Cute Clips

I use clothespins for everything.  I'm still working off a shoeboxfull that came with our vintage fifties ranch so I haven't had to buy any for a long, long time.  That said, I was getting a little tired of the old, not so cute ones so we decided to pretty some up with buttons snatched from our button jar.

The children made pretty button stacks and I glued them together and attached them to the clothespins (since I was using my very favorite, but patently child-unfriendly E-6000 adhesive).  I helped Daisy lay out the others and glued them for her.  I've since added magnets to the back and they're doing good work holding up our school schedules and grocery lists on the fridge, while others are sorting papers for me on my desk and we made a few more to use as bag clips in the kitchen.

What do you use clothespins for?
Clothespins + Buttons = Cute Clips SocialTwist Tell-a-Friend

Salt Dough Conversation Hearts for Valentine's Day


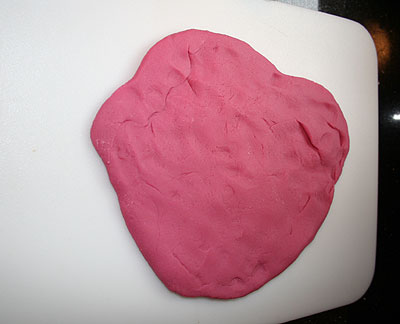
I love those little sugary conversation hearts that you find at Valentine's Day -- they're sweet and tasty (in a delightfully chalky way) and bring me right back to childhood. We made giant ones out of home-mixed playdough.

Best Homemade Playdough

1 c flour
1/4 c salt
2 tsp cream of tartar
2 Tbsp oil
1 c water
food coloring
1 tsp vanilla or peppermint extract (optional)

Stir ingredients together in a medium-sized saucepan. Cook over medium heat, stirring constantly for 2-3 minutes until the dough comes together. Dump it out on the counter and knead for a minute until shiny, smooth, and resilient.

We let it cool until we could handle it, then rolled it out and cut it with heart-shaped cutters. The letters are tiny stamps ... which led to lots of fun stamping with our whole collection. Creativity abounds!


(get it? 'bee' cool? heh heh)
Salt Dough Conversation Hearts for Valentine's Day SocialTwist Tell-a-Friend

Ten (more) Surefire Ways to Occupy Your Toddler

A couple of months ago I shared a list of some of my favorite activities for keeping toddlers occupied for a bit when you need to cook dinner, check your email, or (goodness me!) take a break on the couch for a few minutes.  Well, it was such a hit that I thought I'd better share a few more of my standards.  I'll be sharing ideas for preschoolers and older kids in the next few weeks, so check back!

  1. Set up a game of kitchen-ball with a laundry basket and a selection of small balls (crumpled paper balls are great, or tennis balls, wiffle balls, large bouncy balls, even beanbags work--nothing that could be a choking hazard, depending on the age of your child!)  Have your child try to toss the balls in from a short distance.  They'll usually wind up chasing the balls around as they bounce away so it lasts longer than you'd think!  Alternately, lay a paper grocery sack on it's side and have the child roll the balls into the bag. 
  2. Get out a muffin tin (one with six holes works well) and provide your toddler with an assortment of small, safe things to "sort" (duplo legos, large bouncy balls, plastic links).  Admittedly, it's possible that little sorting will actually occur, but the process of filling and emptying the compartments is just so satisfying!
  3. Supply your child with a feather or lambswool duster and send them to town cleaning any horizontal surface they come across.  I can't guarantee that they'll do a decent job, but is that really the point?
  4. Tape or tie an empty cardboard mailing tube at an incline to two legs of a table or through one arm of a chair and atop the other arm and have your child send big bouncy balls, matchbox cars, etc through the chute.
  5. Cut a fairly large slit in the top of a shoebox to make a "mailbox".  Provide your child with a deck of playing cards or collection of old hotel key-cards, ID cards, etc (that's the mail!).  Show him or her how to drop the cards through the slot one at a time, then dump them out and do it again. 
  6. Provide a dishpan with a bit of water, a little sponge, and a collection of spoons (teaspoons, tablespoons, serving spoons, baby spoons, etc) for your little one to wash and sort.  You may want to set this up on a towel in the kitchen to contain the mess!
  7. Once the spoon wash-and-sort gets old, put the spoons away and add more water, a few small floating tub toys and a little kitchen strainer.  Show your child how to dip the strainer in like a net to catch the little toys and lay them out on the towel to dry.  
  8. Rustle up an old wallet and fill it with hotel key-cards, old ID cards, coupons clipped from the Sunday paper, and money-sized bits of construction paper.  Watch your child empty the wallet, organize the contents, put everything back in, then start again.  Alternately, fill a small purse with little animal figures, old cards, coupons, old keys, etc. 
  9. Cut a tunnel-shaped opening in the side of a shoebox to make a matchbox car garage.  Show your child how to drive little cars in, then open the lid to find them again!
  10. Set up a basket or shelf with a collection of small, empty food containers (i.e. jello or rice pilaf boxes, yogurt cups, butter boxes).  Have your child "shop" by filling a grocery bag with whatever's on her "list" (the one in her head, anyway!), then put the groceries back and try again.
What are your tricks for keeping the under-3 set occupied when you need a few minutes? 
Ten (more) Surefire Ways to Occupy Your Toddler SocialTwist Tell-a-Friend

Pop Rockets! 5, 4, 3, 2, 1.......

So I've been trying various things with Jasper since school started for his sister and some have worked great (smashing playdough, for one) while others, well, not so much (anything drawing-related). With this one I've really hit it. I have one word.

Rockets.

Seriously, it seems like boys are generally very transportation-oriented, and rockets seem to be the pinnacle of interest for my guy. Combine that with the hands-on science aspect of this project and I really found a winner! (I should say that everyone loved this--both Josie and Daddio joined in at launch-time).

Materials:
  • paper towel tube
  • file folder (or light cardboard such as a cereal box)
  • glue stick
  • stapler
  • scissors or craft knife
  • empty film canister (the one with the lid that fits inside worked slightly better than the traditional type that's black with a grey lid--I asked for one in the Target photo department)
  • alka-seltzer
  • water
Process:

1 - Cut a 3" circle out of your file folder and cut a slit to the center.

2 - Cut four triangular fins out of the file folder, each about 2" high (see the one in the picture, above?). Snip about 1/2 inch off the top of your triangle, then fold in about 1/2 inch. Make two snips in to your fold line to create three tabs. Fold them in opposite directions.


3 - Snip one end of your paper towel tube into little tabs, about 1/2 inch square. Mash them in a bit with your hand to round the end.

4 - Roll your circle into a cone shape, then glue and staple to hold it. (this is apparently where I stopped taking pictures, go figure!)

5 - Apply plenty of glue stick to the mashed-in end of your paper towel tube and stick the cone onto it. Hold for about two minutes while the glue sets.


6 - Glue fins on around the bottom.

7 - Stick your film canister up inside the base of your rocket (inside the paper towel tube; it should fit exactly), with the open end facing out. Hold on to the lid!


8 - Add 1-2 Alka Seltzer tablets, pour in a bit of water, put the cap back on (quickly!), set it on the ground pointing skyward (hustle, hustle!) and stand way back and wait for blastoff. Don't forget your binoculars!

Our rocket popped up by a couple of feet on our best attempt (two tablets, fill about 2/3 full of water), perhaps not nearly as impressive as Jasper was imagining (orbit?), but it was such a fun project. We talked a bit about what was happening inside the film canister as the Alka-Seltzer reacted, and as the kids get older it will be fun to experiment more and collect data about what works better (1 tablet or two? More water or less?). Definitely a boycraft success!

So what are your boys into these days? Are they the transportation-rocket-blastoff type, or does something else get them fired up?
Pop Rockets! 5, 4, 3, 2, 1....... SocialTwist Tell-a-Friend

amazing mobiles: link


I LOVE these. Check them out at plum pudding!(image via plum pudding)


(we're still traveling, but we'll be home soon and I'll have so much to share!)


amazing mobiles: link SocialTwist Tell-a-Friend

pop-up greeting card tutorial

Josie's really been into making pop-up cards. She's always creating bits of love for each member of the family but this has really caught her fancy, and I can see why. It is just such a simple and effective little project; so easy a five year old can do it!

First fold your paper in half and cut two 1" slits into the folded side. It should look like this when you unfold it (although your construction paper may not be so wrinkly):
Fold it again, tucking the tab that you've cut (in the center part of the fold) inside the card. When you open it a bit it will look like this:
The top illustration was our first try; the pop-up birthday cake (forest with trees? castle?) is simply glued onto half of the pop-up tab. It lays flat inside the card then is lifted when the card unfolds; just make sure that your glued-on thing doesn't go down below where your tab folds into the card (you can always make a bigger tab if need be).

I'm really excited to give this a try in some of the books that the kids have been putting together! (okay, so Jasper's are filled with scribbles, but does that really matter?)

Check out other craft ideas from the collective!
pop-up greeting card tutorial SocialTwist Tell-a-Friend

nature collages

Jasper's nature picture, with maple leaf, maple seeds (samaras), pine needles, pine twig, pinecone, bark, and a tiny flowerOver the weekend we had a ton of work to get taken care of so we were outside most of the day (except when our neighbors were celebrating something with an outdoor karaoke party). Josie remembered doing this last fall before Adelaide was born and suggested it again. With all the neat stuff we have sprouting right now there was a bounty of nature for our nature pictures.


My apologies for not having more pictures of the process, but we were all working on it together (having put aside our yard work!).


Materials:

  • Heavy paper: cardboard, matboard, cardstock, etc.

  • White glue or hot glue for heavier things like shells or large pinecones

  • Nature goodies collected from your yard, a nature walk, the park, the neighbor's yard... If you're planning to keep this you may want to select things that dry well (avoid certain flowers or very pulpy leaves).

  • May need a craft knife to trim nature objects


Process:

  1. Have your child lay out their objects on the paper in whatever arrangement they'd like. For very three-dimensional objects such as pinecones you may have to shear off one side of the object to give a glue-able area (don't forget to look for seeds inside the pinecone!).

  2. Lift each object and lay down a good amount of glue.

  3. Have your child place the object back on the glue (or do it yourself if you're using hot glue).

  4. Make sure to leave it flat until the glue dries, then handle fairly gently.


Josie's work. She decided to line the objects up along the bottom (maple seeds, pine needles, pinecone, flower, with a long pine twig), then draw them above.


Here's an awful picture of Josie's from last fall--she was just so excited to be able to label everything. I just couldn't get a better shot since it's been installed in Daddio's office in a shadowbox (for-evah!).


When you're done go get a straw and pretend to drink nectar from all the flowers with your proboscis!
nature collages SocialTwist Tell-a-Friend

puppet theater

I just have a minute, but wanted to share a picture of the puppet theater that I helped Josie and Jasper with this week. We're going to make another so I'll plan to share a tutorial next week!

(p.s. Jasper would want me to tell you that *he* made the kelp.)
puppet theater SocialTwist Tell-a-Friend

"snow-globe" bracelets: link

Having a girl is easy. Glitter and sparkly pink sequins are appealing to most, drawing flowers is girly, dress-up clothes are usually dresses (have yet to find a 'prince charming' costume in the Disney aisle at Target). Socially, my dress-wearing, pink-loving, flower-picking boy may grow up to be an outcast if we keep down this path. Long story short, I'm always looking for boy-appropriate crafts, and this one at Scribbit really hits the mark with boy-appropriate bracelets, and would be fun for younger and older kids. I was thinking that you could make a little kit out of the items for a birthday gift (see, there again, it's easy to come up with handmade, thoughtful gifts for girls, harder for boys...), or use it a a playgroup or birthday party activity. Michelle at Scribbit calls them 'bracelets of power;' Josie thought they were fun like snow-globes : )


Photo from scribbit.blogspot.com
"snow-globe" bracelets: link SocialTwist Tell-a-Friend

Follow the Line through the House: review and activity


Follow the Line through the House


Written and Illustrated by Laura Ljungkvist


Ages 3-9


See the little tail on the bottom of the 'F' up there? The one in 'Follow'? That's the beginning of the line, which carries you through the house, the kitchen, the toolbox, the toy box (to mention a few places), out into the backyard, all the way to the tiny tail at the 'E' in 'Goodbye'. Each page describes where you are and gives you several tasks: pink shoes to find, screwdrivers to count, bandages to choose from. Illustrations consist of outlined objects (the line) and background and extra items that are visually very distinct from the path of the line making it easier for little eyes and fingers to follow it from page to page.


Mommy: I'm a pretty linear thinker and I often have trouble with books that don't follow a typical progression, plot, story, etc. (wordless books give me fits!) This one, however, is so easy to follow, and I love the didactic nature of the questions and tasks that the book poses as you go from page to page. It's been an especially good choice to read to the two kids since Josie is able to answer the more difficult questions while Jasper tackles the simple ones, or they are able to work together (hallelujah!) to find all of something. Long after we finished reading it together the two of them were still sitting and looking at the detailed pictures that completely fill every page. We all enjoyed the modern nature of the illustrations and I was taken with the very idea that you could trace the line from page to page. Daddio especially seemed to enjoy reading it :)

That said, I think that if you have a child who is very plot-driven they won't be taken in. It's very interactive by it's nature and if your kid isn't into it they'll be lost.


Josie (5): I liked the pictures and all the things that there were to find. My favorite page was the refrigerator, no the (um, what's that thing where they keep all the band-aids?) medicine cabinet. It was a good book. We should buy it.


Jasper (2.5): Good book. I like do line with my fingah. Oooh, and the wrench. I too like da wrench.


This is Ljungkvist's second book in this series, following "Follow the Line." Her third, Follow the Line Around the World, is coming out this month.


Activity:


Even after reading this a couple of times, I felt like Josie (5) was kind of missing the point about the images being made of a single line that runs through the book and the artistic challenge that comes with that. With that, I challenged her to draw a picture with only one line. It took a few tries, but she finally got the concept.


Update: Since we did this, I can't seem to get her to pick her pen up! Everything is formed from a single line, from her name in block letters to her usual drawings.
Follow the Line through the House: review and activity SocialTwist Tell-a-Friend

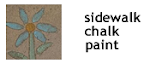
kid-made sidewalk chalk paint


It's my eternal struggle. I want the children to paint, I truly do, but it can just be so so messy...especially for a two year old who paints for two minutes then requires ten minutes worth of cleanup (and a bath to get it out of his hair). Often enough I bite the bullet and do it anyway, but with Summer comes the marvelous opportunity to do it every day, especially now that we've found this awesomely cheap recipe for making our own sidewalk paint.


You need:


-liquid food coloring (like what you find in the spice section at the grocery)

-box o' corn starch

-water

-minimum 8 oz individual containers for each color


Method:

-Measure 1/4 cup cornstarch into each cup.

-Add 1/4 cup water to each.

-Drip in 5-10 drops of food coloring.

-Stir it up. At first it will seem as though the cornstarch just won't mix in, but all at once it comes together. Just don't put the water in first or it's significantly tougher to get it to mix up.


-Add more color for intense colors, less for pastel shades. Our box has recipes on the back for additional shades and we found that the 'egg dying' recipes worked great for this.

-The finished paint may seem thin, but it paints on just great. You can use more cornstarch next time if you'd prefer a thicker paint.

-We tested on the driveway, fence, and brick, and the paint came off of all the surfaces just fine.


Finally, find your personal painting style. Josie's into painting happy-faced flowers and hopscotch boards, while Jasper's a mix it all together and see how it turns out kind of guy.


*note--One of the comments pointed out that the paint is slippery when it's wet! We didn't test this theory out, but be careful!


more from the collective:

kid-made sidewalk chalk paint SocialTwist Tell-a-Friend

Ice Treasures: link


I was looking around for something totally unrelated and stumbled upon Let's Explore, a blog serving up creative ideas for preschoolers. Today's post on Ice Treasures really caught my attention since the weather's heated up so much in the past few weeks and we've been spending as much time outside as possible (the better to let the baby sleep!). I have a few ideas lined up, but this is so cool!


(as an aside, you might want to check out the Let's Explore store where you can find some very handy art totes (empty or filled with creative goodness) and kits/busy boxes for various projects (e.g. puppetmaking). Free shipping with code "maymoms08" through the end of May. I looked and looked for the right box to put together a take-anywhere art kit like the one I had as a child and just couldn't find it among the tool and fishing tackle boxes at Target, Wal-Mart, Home Depot, Ace, or the local hardware store. She has it!)
Ice Treasures: link SocialTwist Tell-a-Friend

printmaking: bubble wrap and corrugated paper

A few weeks ago we did some potato stamping and ever since Josie's been into the idea of making prints ever since. She'll watercolor a picture, then try to make a print onto a clean sheet (not entirely effective), and we tried making a print of a crayoned picture using our iron (even less successful). This worked very well and really held Josie's (5) and Jasper's (2.5) attention for a long time (20 minutes). We used bubble wrap with small bubbles (it's what we had!) but I think larger bubbles would work well also, and a combination of the two would be fun to experiment with.


Materials:


Bubble wrap, textured paper (ours was corrugated), crumpled paper, or other thick papers or plastic goods that have a strong texture

Thick multicolored tempera or poster paint

Brushes

White paper to print on


Process:


Paint a design onto the bubble wrap or textured paper; don't get too much paint on or you'll lose the raised design and get a lot of paint down in the cracks--also interesting, but you lose some of the 'print' concept.


Place the paper on top of the painted surface and press down firmly with your hands or a brayer or rolling a wooden dowel. Peel paper off.


If you're using the crumpled paper it seems to work best to dip it into the paint then print it all over the paper to make a pattern. This is fun since you get a completely different variation on the concept of a 'print.' Once the crumpled paper is unfolded it's interesting to see where the painting surface was relative to the unpainted part.
printmaking: bubble wrap and corrugated paper SocialTwist Tell-a-Friend

ribbon activities: links

The blog Unplug Your Kids posted a couple of fun ribbon bookmark ideas, one a wide ribbon with sequins and buttons glued on, the other woven with pipecleaners and ribbon, with beads on the end. (Josie, 5 has been into the weaving idea but most weaving projects are a little too big for her, so this will be a fun one to try!)


Also, Let's Explore posted about some ribbon collages her girls did. Very cute and interesting to see the approach each child took (and I liked her little ribbon caddy :)
ribbon activities: links SocialTwist Tell-a-Friend

Naturally colored playdough: link

What Knot posted a great idea for coloring playdough with beet cooking water. It came out a lovely color and wow, think of the possibilities! Spinach water? Blueberry juice?
Naturally colored playdough: link SocialTwist Tell-a-Friend

Woven strawberry basket pendants: link


I'm still feeling really into Mother's Day, so I was excited to find this fun idea at Scrumdilly-do. I'm not nearly sure where I'm going to find strawberry baskets, but I love the idea of using them for weaving, and these turned into an absolutely charming necklace. I'll make sure to hang mine up with the colored macaroni shell and marker lid necklaces Josie's brought home from preschool!
Woven strawberry basket pendants: link SocialTwist Tell-a-Friend

tissue paper flowers: link, mother's day gift idea


The Rowdy Pea has a tutorial for making tissue paper flowers up. We've made these a number of times on our own and as a playgroup activity and it is so fun! We cut different shapes of flowers out to make poppies, cornflowers, daisies, etc, or just layer them randomly to make a fun made-up blossom. I'd say it's suitable for kids starting around 3 if you were to cut out the flowers shapes and have them string them onto the chenille stem.
tissue paper flowers: link, mother's day gift idea SocialTwist Tell-a-Friend

diy baby stuff website


Poking around on ohdeedoh this morning I loved the tutorial on recycling boxes and other packaging into cool building blocks and clicked through to a fun site:

Make Baby Stuff - Baby crafts tutorials, instructions for how to make baby clothes, how to make baby toys and tons of DIY crafty projects for all things baby! Your how-to resource for baby's homemade lifestyle.


Amber has a variety of neat DIY patterns for baby pants and slings, recipes and craft ideas. I'll definitely be checking back. For now, though, go be inspired by her building block tutorial!
diy baby stuff website SocialTwist Tell-a-Friend

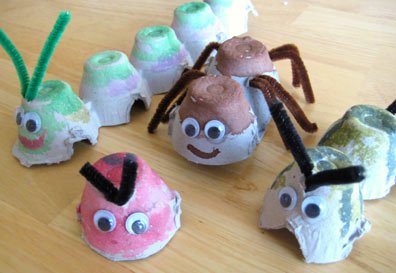
more egg carton crafts: project

Marie at Make and Takes has a great post up with egg carton crafts . Her flowers turned out to be way more interesting than mine, and I love the bugs! We go through a ton of eggs, so I'm stocked to try this neat idea.
more egg carton crafts: project SocialTwist Tell-a-Friend